Intro
Kubernetes on Raspberry Pi? What? How does that fit in here?, you’d ask. Well, the intention maybe not be obvious at first. The goal here is to set up a functional Kubernetes cluster using a couple of Raspberry Pis. We will use those in the later tutorials for e.g. genome assembly. Of course there are plenty of other options to assemble genomes that do not require Kubernetes. You can run it on your laptop, provided it’s powerful enough (depending on the type of the assembly too), or in the cloud (most likely not for free though). However, I believe Kubernetes is a really cool technology and there is plenty to be learned from setting our workflow up that way.
At the same time, it is not my intention to introduce the concept of Kubernetes itself here. There are many other resources out there so if you want to learn more before starting, check out some links in the references below. Also, other people wrote similar tutorials before and this one is heavily inspired by some of those – I placed all of them in the references as well.
Alright, enough of the introductions, let’s dive right into it!
Required hardware
Let’s start with a list of required hardware. Here are some suggestions based on what I used in my own setup:
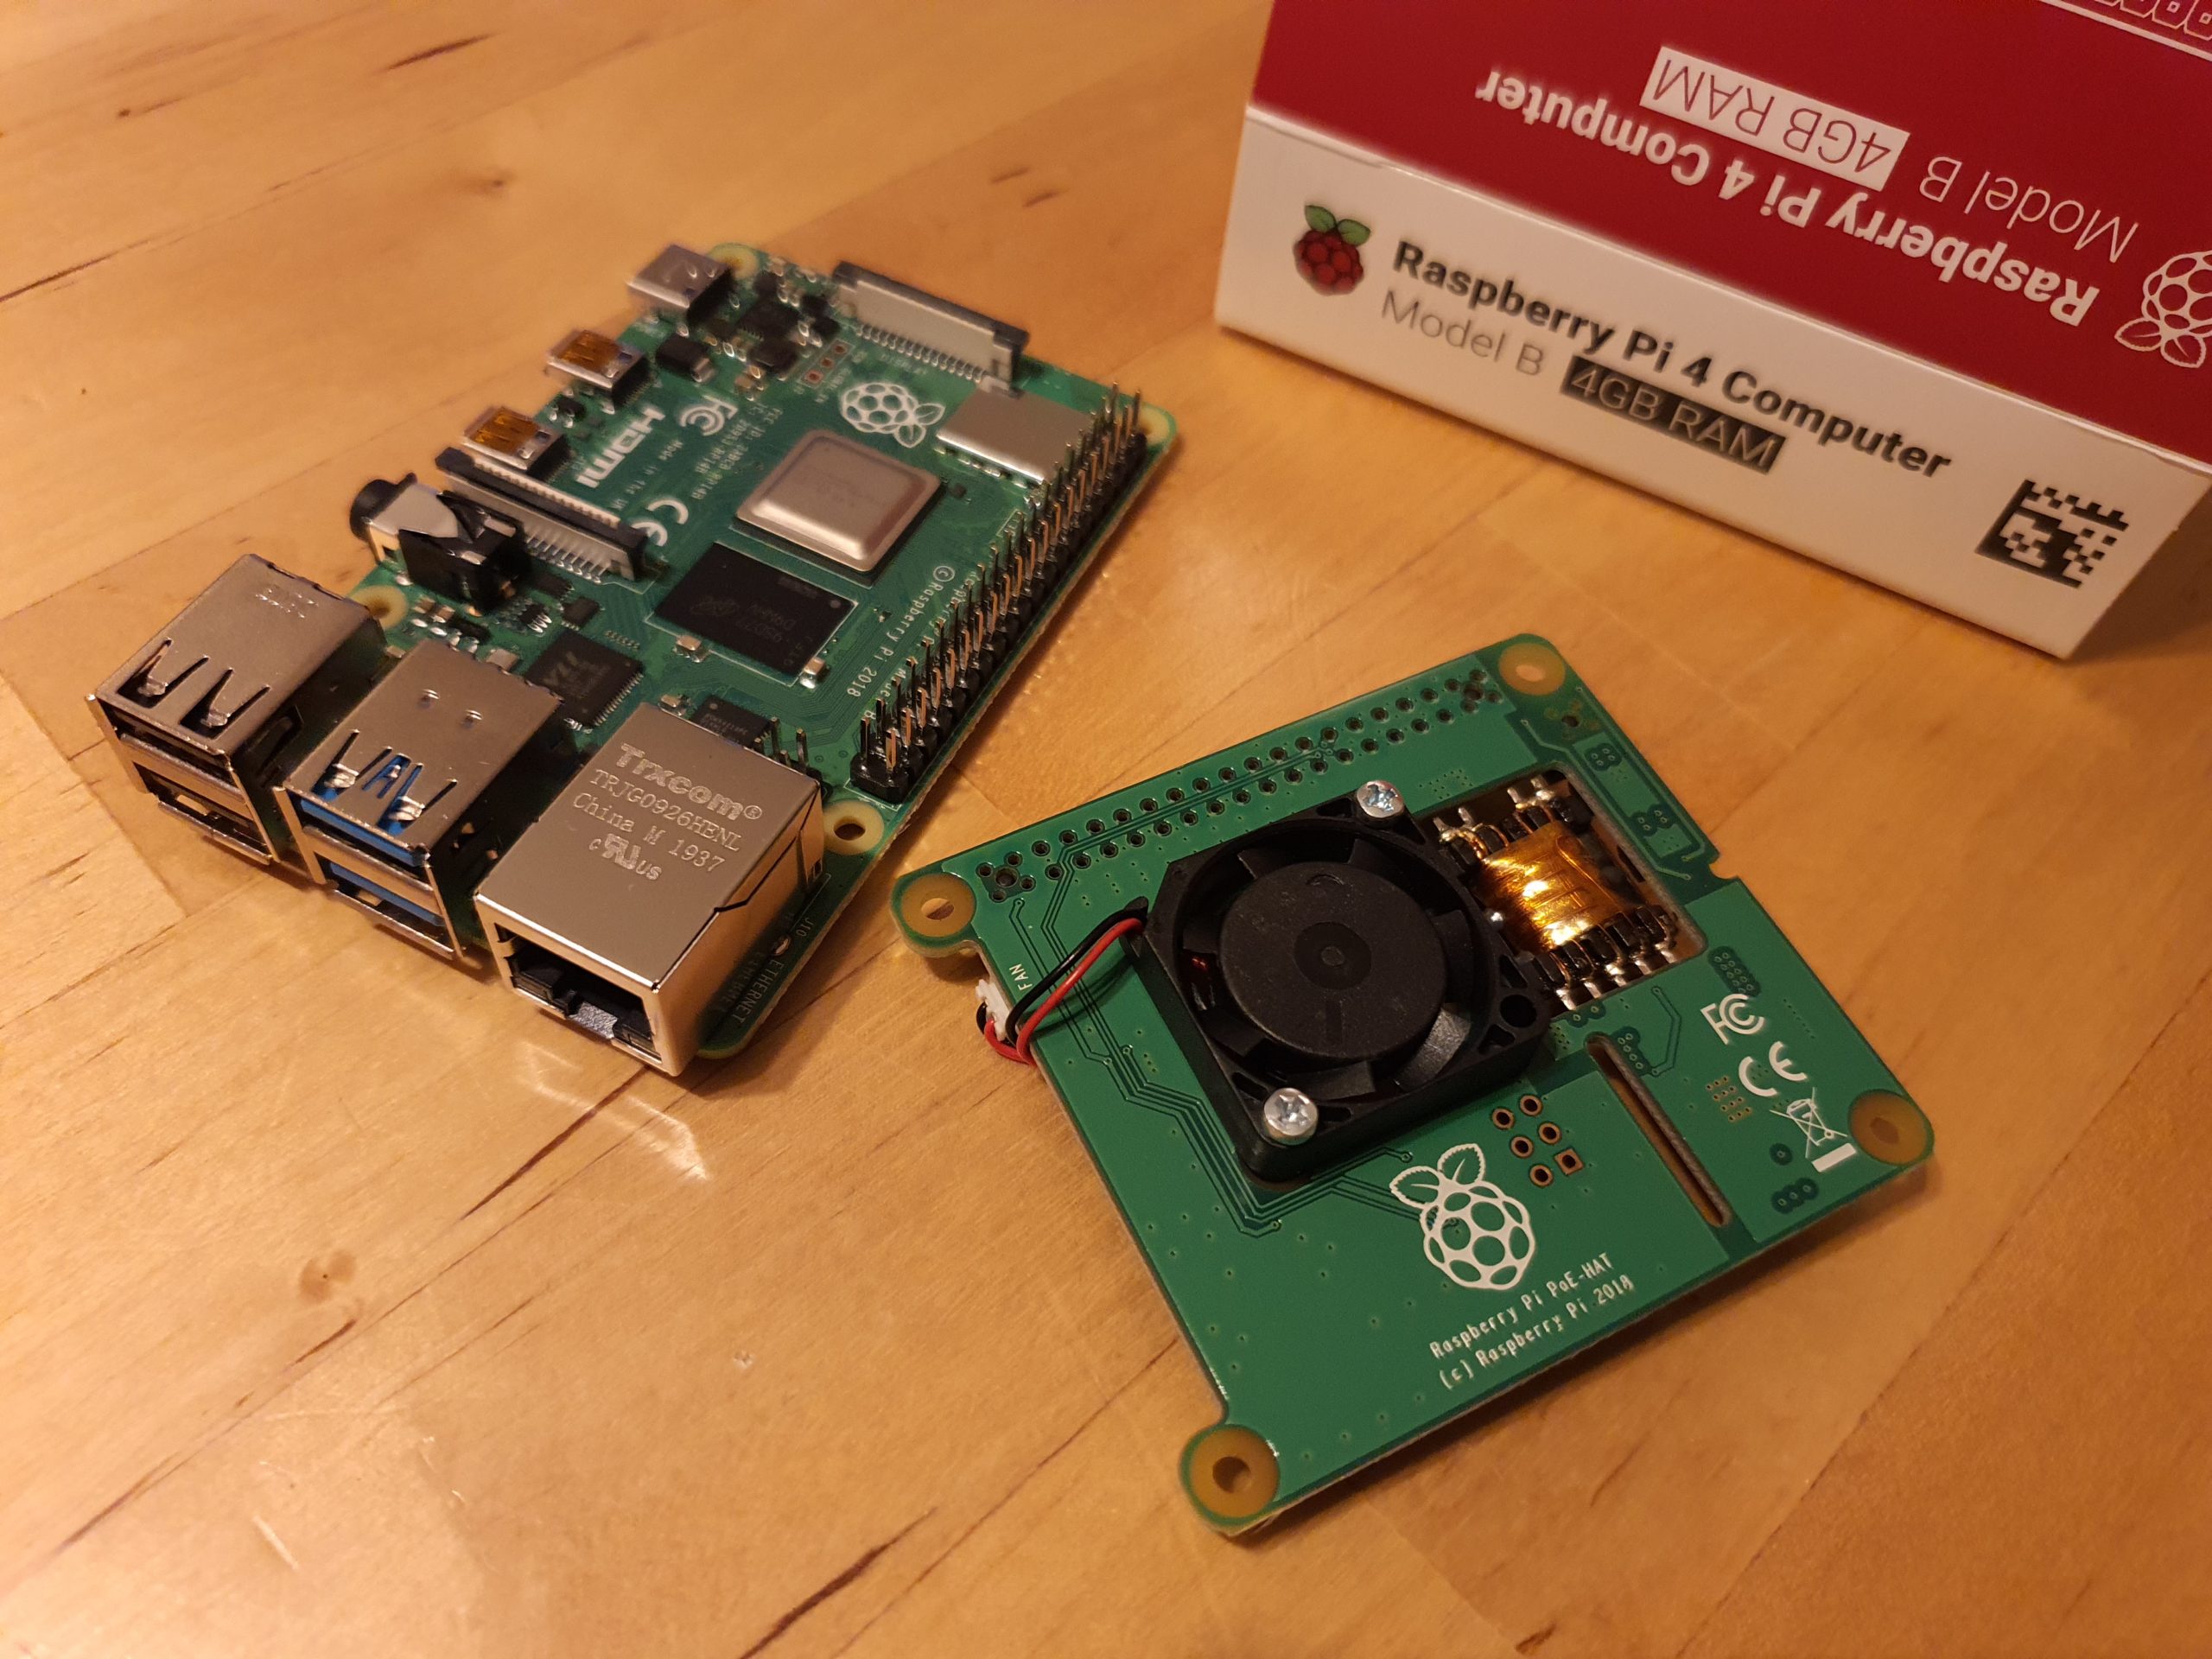
- 3 x Raspberry Pi 4 (4GB) – 1 master node + 2 worker nodes (feel free to add any number of the workers though!)
- 3 x SanDisk Ultra 16 GB microSDHC A1 Class 10 (or equivalent)
- 3 x Power over Ethernet (PoE) HAT for Raspberry Pi 4 – so that we don’t need to power all the Pis through an additional power cable but rather over the network (Power over Ethernet)
- TP-Link TL-SG1005P Ethernet Switch – to connect all the Pis to the network
- RJ45 Ethernet Cables (0.5 m)
- some sort of a rack to keep it neat – just check out some online stores, there are plenty of options
Let's get to it
Put the hardware together
Assemble all the parts together: connect PoE HATs to the Pi boards and install those in the rack (if you got one). Connect Pis with the switch and switch with your router but do not power the switch yet (we’ll prepare the microSD cards first). Below are some pictures of my own setup.
Note: I used an older version of Raspberry Pi (as I had it lying around anyway) as the master node – that’s why one board does not have a PoE HAT on the pictures (it’s not compatible with that model).


Prepare SD cards
- download the Raspberry Pi OS Lite image from here – at the time of writing I used kernel version 5.4 from 2020-12-02
- burn the image to all SD cards – you can use software like balenaEtcher
- create an empty file called ssh and place it on each of the SD cards (on the boot partition ) – this will allow us to ssh into every pi
- place all the cards into your pis and boot up the switch – that will provide power to all the nodes (if you’re using PoE HATs on all of them)5.4
Set up networking
For this part of the tutorial it may be useful to use a terminal that supports sending commands to multiple windows at the same time. If you’re not using it yet and you’re a MacOS user, I’d recommend checking out iTerm2 – all the great features aside, it has a built-in support for sending commands to multiple sessions (CMD+D to split the window into panels, CMD+SHIFT+I to switch to the multi-session mode). All the steps described below are performed on all nodes.
- ssh into all your nodes:
~$ ssh pi@node_ip_address
- change nodes’ hostnames:
~$ sudo raspi-config
- go to System Options → Hostname (this may differ slightly if you use a different OS version)
- set the name to something memorable (e.g. k8s-master-01, k8s-worker-01/02/…)
- exit the menu and reboot when prompted
- assign static IP to the master and worker nodes:
~$ sudo nano /etc/dhcpcd.conf
- add the following at the end of the file:
interface eth0
static ip_address=192.168.1.x/24
static routers=192.168.1.1
static domain_name_servers=8.8.8.8
notice how we have 192.168.1.x on line 2 above – here you should insert the desired IP address of your nodes (side note: that entry uses CIDR notation – check out this article to learn more)
- disable SWAP at node startup (k8s requirement):
~$ sudo systemctl disable dphys-swapfile
- reboot all nodes:
~$ sudo reboot
- when the nodes are back online ensure correct IP-tables are used (as mentioned here):
- ensure legacy binaries are installed:
sudo apt-get install -y iptables arptables ebtables
- switch to legacy versions:
~$ sudo update-alternatives --set iptables /usr/sbin/iptables-legacy
~$ sudo update-alternatives --set ip6tables /usr/sbin/ip6tables-legacy
~$ sudo update-alternatives --set arptables /usr/sbin/arptables-legacy
~$ sudo update-alternatives --set ebtables /usr/sbin/ebtables-legacy
- ensure legacy binaries are installed:
Install Docker
Finally, Raspberry Pi OS comes without Docker that will be required later by Kubernetes so we will install it on all the nodes.
- Fetch the latest Docker install script and execute:
~$ curl -sSL get.docker.com | sh
- Add current user to the docker group:
~$ sudo usermod pi -aG docker
- Change current group id to docker:
~$ newgrp docker
Add we are done with Part 1! By now, you should have all your future k8s nodes configured and ready for the actual Kubernetes setup which we will cover in Part 2. Stay tuned!
References
Kubernetes resources:
- Kubernetes‘ official web page (and their introduction)
- An Introduction to Kubernetes by Justin Ellingwood
- What is Kubernetes? by Ali Gerrard
Other tutorials where I got my inspiration from:
- How to Set Up a Raspberry Pi Cluster by Richard Youngkin
- Building a Raspberry Pi Kubernetes Cluster
- Setting up a Kubernetes on ARM cluster on Raspberry Pis by Martin Jensen

Hey! I’m a protein biochemist by training with a more recent software development experience. Here, I’ll be trying to combine a bit of both – let’s see though where we’ll end up with that 🙂